Ever catch yourself straining for your toes or rounding your back just to reach your feet? A strap gives you more reach without asking your body to fake the range. A yoga strap for flexibility works like an extension of your arms, helping you set up hamstring, shoulder, and hip stretches without turning the pose into a tug-of-war.
The goal here is not to get deeper today. It is to find a setup you can breathe in and repeat. Flexibility changes usually build over weeks to months. For a wider plan with props, routines, and ways to progress, use our yoga flexibility guide. If you want to stay with strap work, use the check below to find which body-area section to start with today.
Find Where to StartThis page contains affiliate links. If you purchase through them, I may earn a commission at no extra cost to you. As an Amazon Associate, I earn from qualifying purchases. Learn more.
Table of Contents
- 5 Rules for Using a Yoga Strap Without Forcing the Stretch
- Why a Strap Helps Flexibility
- Choosing the Right Strap
- Safety First: Set Up for Strap Work
- Find Where to Start With a Yoga Strap
- Yoga Strap Exercises for Flexibility
- How to Progress Without Pulling Harder
- FAQ: Using Yoga Straps
- Make the Stretch Fit Your Body
5 Rules for Using a Yoga Strap Without Forcing the Stretch
- Use the strap to extend your reach, not to pull yourself into end range.
- More slack is often the better modification: keep knees soft, shoulders easy, and your breath normal.
- For the static stretches here, about 30 seconds at a mild stretch is a practical starting point; pain is a stop signal.
- If 8 ft leaves enough working room, you do not need a longer strap. Go longer only when you need more slack for the setup.
- Judge progress by a calmer setup and easier range—not by how close you get to your toes.
Why a Yoga Strap Helps With Flexibility
I still remember my first attempts at touching my toes: the pose felt like a fight between my hands and my hamstrings. The useful shift with a strap was not that it pulled me farther. It gave my hands somewhere to land while I kept the rest of the pose more honest.
That is the strap’s main job—bring the pose to your current reach instead of making your body chase the pose. In practice, that can help you:
- Extend your reach: In a forward fold, the strap gives your hands a connection point without forcing you to round just to grab your feet.
- Keep the setup consistent: A repeatable hand position makes it easier to notice whether your knee bend, shoulder position, or comfort is changing over time.
- Scale shoulder and hip work: More strap length or a wider grip can make a position workable without treating the deepest version as the goal.
- Back off quickly: If the sensation becomes sharp, pinchy, or strained, you can add slack or come out instead of fighting to hold the shape.
Regular stretching works best as a gradual practice rather than a one-session fix. Harvard Health notes that meaningful flexibility changes can take weeks to months, with consistency needed to maintain them. See its stretching overview.
Choosing the Right Yoga Strap
You do not need a feature checklist. Three things matter most: enough length for your body and the pose, a grip that feels comfortable in your hands, and an adjustment that stays put once you set it.
- Length: Choose enough slack that you can hold both ends without hiking your shoulders or rounding your back. If 8 ft gives you that working room, it is enough; if not, go longer.
- Hand feel: Pick a strap you can hold without squeezing hard. If the surface feels rough or slippery in your hands, a different material may suit you better.
- Adjustment: The buckle should be easy enough to change between poses and secure enough that the loop stays where you set it.
That keeps the buying decision simple: fit the strap to the setup you want rather than choosing the longest or most elaborate option by default.
When an 8-ft Strap Is Enough
Manduka AligN Yoga Strap
The 8-ft version uses unbleached natural cotton webbing with a sure-secure interlocking buckle. If 8 ft does not leave you working room, look for a 10-ft strap in the same cotton-webbing style with a D-ring or interlocking buckle — the length is the only thing that needs to change.
Safety First: Preparing to Use Your Yoga Strap
Before you add a strap, make sure the body is warm and the setup is easy to back out of. A few simple rules do most of the safety work:
- Warm up first: Spend 5–10 minutes on light movement such as walking or easy dynamic motions before longer static stretches.
- Treat pain as a stop signal: A mild stretch is enough. If you feel sharp, pinchy, or strained sensations, add slack or come out.
- Keep breathing normally: If you have to brace, hold your breath, or grit your teeth to stay there, reduce the range.
- Skip tugging: Let the strap bridge the distance between your hands and the pose; do not use it like a winch.
- Use soft joints: A small knee bend or wider hand position is a valid modification when it keeps the rest of the shape comfortable.
If you are not sure whether an area is simply tight or better left alone today, use the check below before choosing a stretch.
Find Where to Start With a Yoga Strap
Choose how your hamstrings, shoulders, and hips feel right now. This is not a flexibility score—the goal is to notice where a strap may help with reach and where it is better to back off.
Choose a status for all three areas to get a starting-point suggestion.
Yoga Strap Exercises for Flexibility
Now you can put that rule into practice. These six yoga strap stretches cover hamstrings, shoulders, and hips, with each one scaled so you can choose reach and control before depth.
Hamstring Stretches for Flexibility
Tight hamstrings can make forward folds feel cramped. The strap’s job is to bring your hands to the pose without dragging the leg toward you. If hamstrings are your main limitation, our yoga hamstring stretches guide gives you a fuller progression. If lower-back discomfort is the bigger issue, use our lower-back yoga guide instead of pushing deeper here.
Reclining Leg Stretch (Supta Padangusthasana Variation)
Benefits: Stretches the hamstrings and calves while the floor gives you a stable base. Easy to scale with a bent knee.
How to Do It:
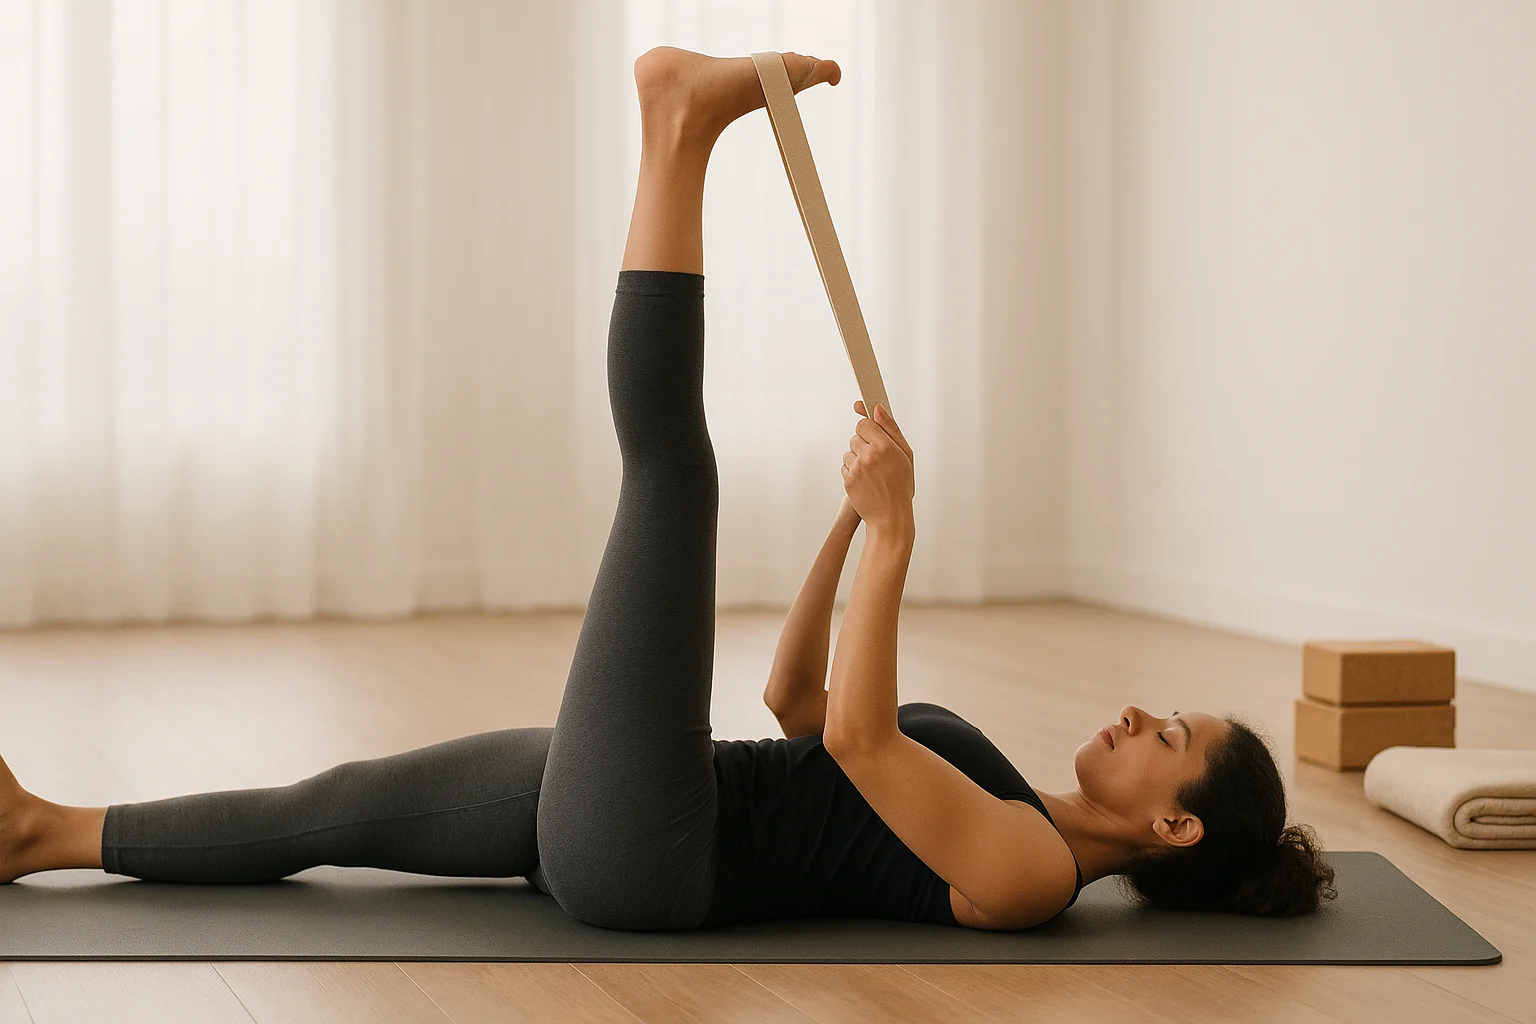
- Lie flat on your back with legs extended — bend your left knee and place your foot flat if your lower back feels tight.
- Loop the strap around the arch of your right foot, holding one end in each hand.
- Slowly extend your right leg toward the ceiling, keeping it relaxed with a soft knee. Imagine lengthening your leg like you’re reaching for the sky.
- Keep light tension on the strap and let it support the leg. Stop when you feel a mild stretch rather than using your arms to pull the leg closer.
- Stay here for about 30 seconds, breathing slowly and keeping the stretch gentle.
- Lower gently and switch to the left leg.
Prop Tip: If your foot feels far away, take more length in the strap so your shoulders can stay relaxed. Shorten your grip only when the setup still feels easy.
Common Mistake: Don’t lift your hips to chase a straighter leg. Keep the pelvis settled and bend the knee as much as needed.
Seated Forward Fold (Paschimottanasana Variation)
Benefits: Stretches the hamstrings and gives you a supported way to practice a hip hinge with a long spine.
How to Do It:
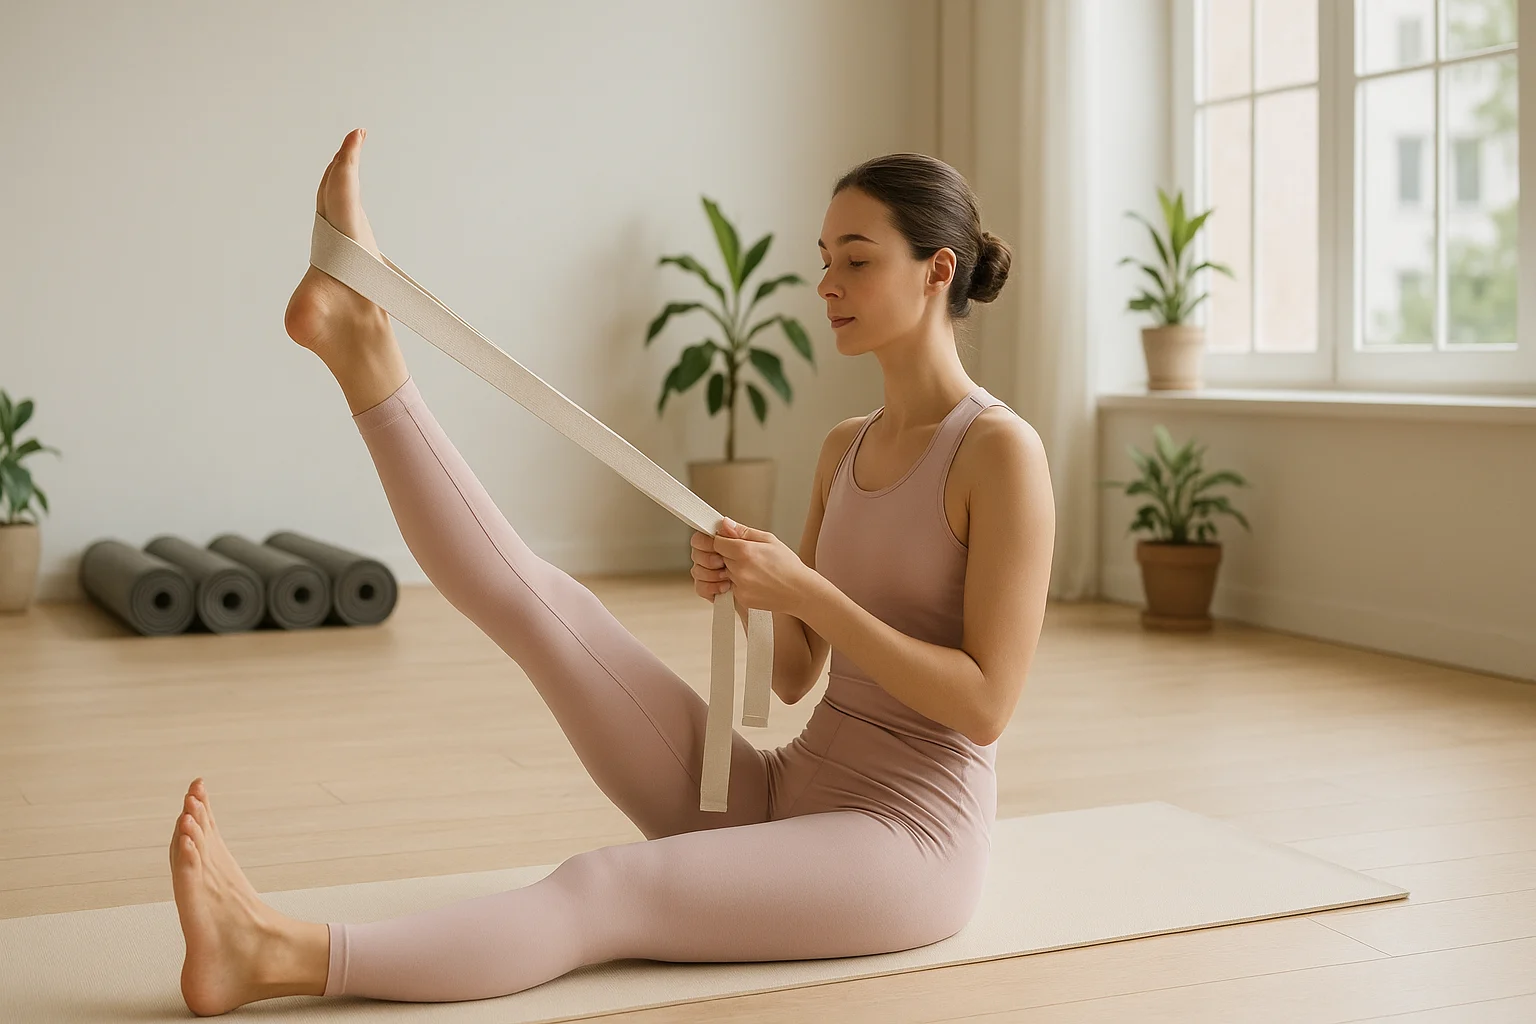
- Sit with your legs stretched out in front, toes pointing up like you’re flexing your feet toward the sky.
- Wrap the strap around the balls of your feet, holding one end in each hand.
- Take a deep breath to sit tall, then exhale as you hinge forward from your hips, bringing your belly toward your thighs.
- Keep gentle tension on the strap as you hinge from the hips. Stop before your spine rounds or your breathing changes.
- Hold for about 30 seconds, breathing smoothly and staying within a mild stretch.
- Sit up slowly and release the strap.
Prop Tip: If your hamstrings are tight, sit on a folded blanket to help tilt your pelvis forward.
Common Mistake: Avoid rounding your back — think about hinging at your hips instead.
Shoulder Stretches for Flexibility
A yoga strap can give your hands a wider connection when shoulder range is limited, so you can work with the motion you have instead of forcing your hands together. If wrist discomfort is the limiting factor, use our yoga wrist stretches for a more relevant starting point.
Cow Face Pose Arms (Gomukhasana Variation)
Benefits: Stretches the shoulders, triceps, and chest while the strap bridges the gap between your hands.
How to Do It:
- Sit comfortably, cross-legged or in a way that feels good for you.
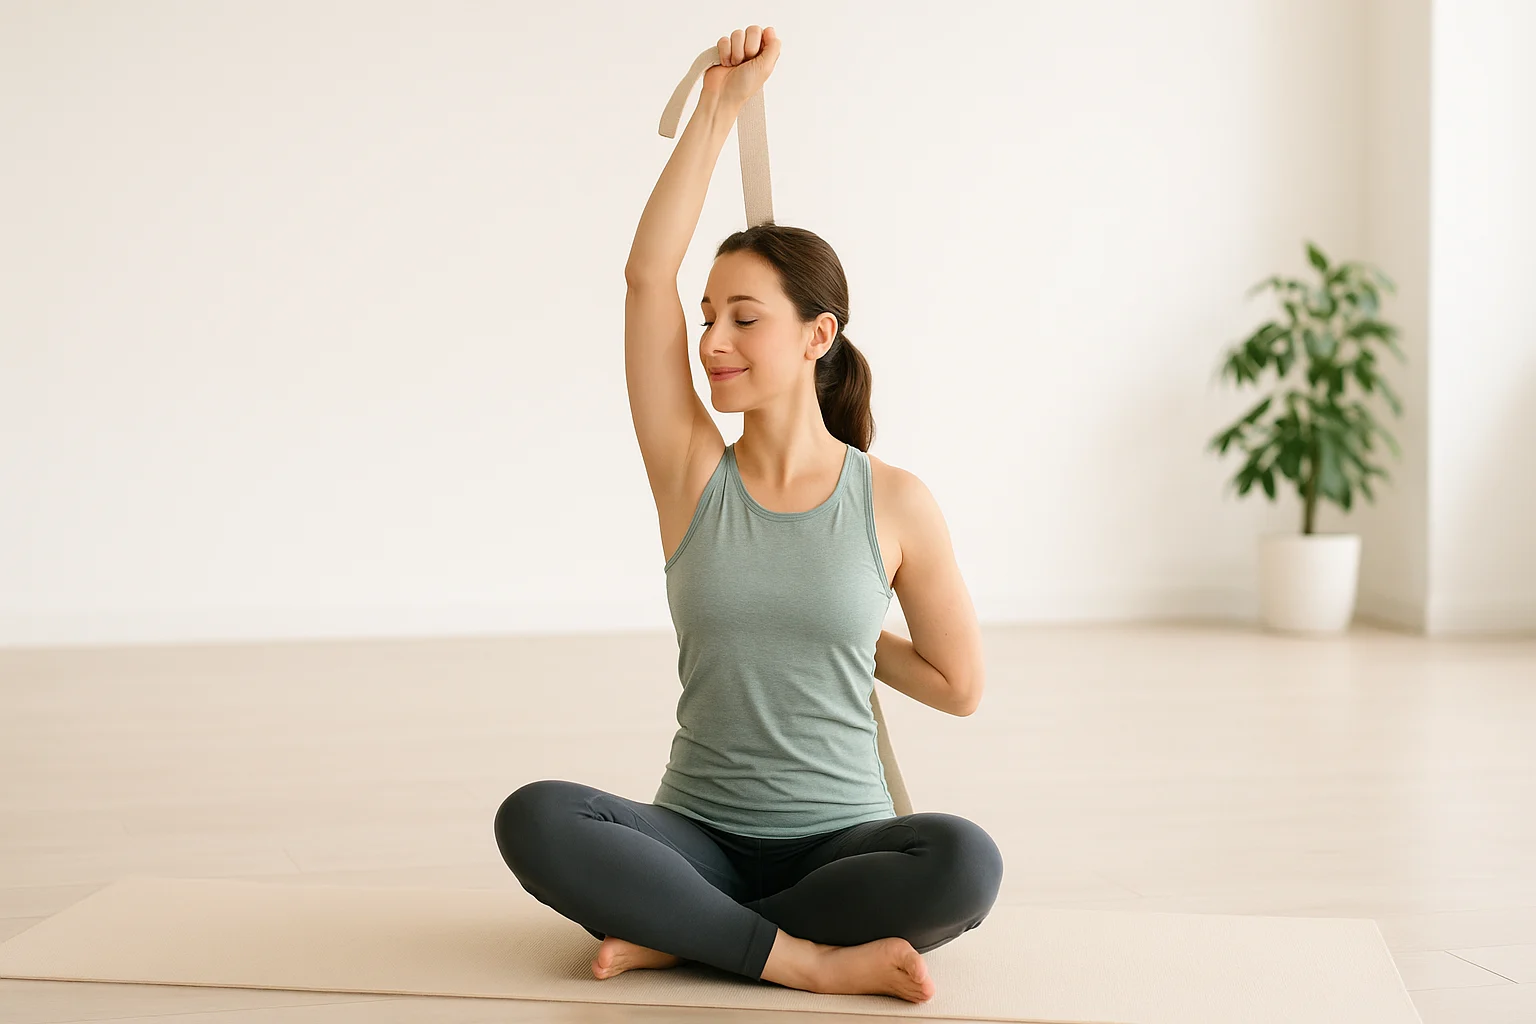
- Hold the strap in your right hand, lift that arm, and bend your elbow so the strap hangs down your back.
- Reach your left arm behind you, bending it to grab the end with your fingers.
- Keep your hands comfortably apart on the strap and sit tall. Shorten the distance only if your shoulders stay relaxed and the stretch remains mild.
- Hold for about 30 seconds, breathing freely and keeping the sensation mild.
- Switch sides with care.
Prop Tip: Your hands do not need to meet. Let the strap fill the gap and keep enough length that neither shoulder feels jammed.
Common Mistake: Don’t hunch forward — sit tall without forcing your spine into a rigid position.
Shoulder Pass-Through
Benefits: Moves the shoulders through a broad arc while a wide grip lets you control how much range you use.
How to Do It:
- Stand or sit tall, holding the strap with both hands, palms down, a bit wider than your shoulders.
- Lift the strap overhead and move only as far behind you as your shoulders allow without pinching. Keep the elbows soft if straight arms make you shrug.
- Bring it back to the front smoothly and repeat 5–10 times. Narrow your grip only if the same motion stays smooth and comfortable.
Prop Tip: If it feels tough, widen your grip to avoid strain and keep the motion fluid.
Common Mistake: Don’t force the strap farther behind you or narrow your grip to prove progress. A wider grip is the right choice when it keeps the motion easy.
Hip Stretches for Flexibility
For hip work, the strap is useful because it lets you control the distance between your hands and legs. Keep the range small enough that the pelvis and breath stay settled.
Supported Dancer’s Pose (Natarajasana Variation)
Benefits: Stretches the front of the hip and thigh plus the chest and shoulders while adding a balance challenge.
How to Do It:
- Stand beside a wall or sturdy chair and shift your weight onto your left foot.
- Loop the strap around your right ankle, holding both ends in your right hand.
- Lift your right foot behind you and let the strap give your right hand a comfortable connection point.
- Keep your left hand on the support if you want extra balance help, or extend it forward when you feel steady. Press your right foot gently back into the strap instead of pulling the foot higher.
- Hold for a few calm breaths and keep your hips even, easing off if you feel sharp pain.
- Switch sides with ease.
Prop Tip: Use the wall or chair for balance so the strap can do one job: bridge the reach between your hand and foot.
Common Mistake: Don’t lock your standing knee — keep it soft for stability.
Reclined Figure-Four Stretch
Benefits: Stretches the outer hip and glutes in a supported position. Skip it if it creates sharp, radiating, or nerve-like discomfort.
How to Do It:
- Lie on your back with knees bent, feet flat on the mat, feeling grounded.
- Cross your right ankle over your left thigh to make a figure-four shape.
- Loop the strap around your left thigh, holding one end in each hand.
- Use the strap to draw the supporting thigh toward you only until you feel a mild outer-hip stretch. Let the crossed knee move away naturally rather than pressing it down.
- Hold for about 30 seconds, keeping your back supported and breathing freely.
- Switch sides smoothly.
Prop Tip: The strap lets your hands stay relaxed while you control how close the supporting leg comes toward you.
Common Mistake: Don’t force your lower back flat. Keep the pelvis heavy and let the back stay comfortable on the mat.
How to Progress Without Pulling Harder
Building flexibility with straps is less about shortening your grip every time you practice and more about making one controlled change at a time. Keep the pose recognizable, then adjust only the variable that no longer challenges you.
- Repeat the same setup first: Notice where your hands land on the strap, how much knee bend you use, and whether your shoulders can stay relaxed.
- Change one thing at a time: Use a little less knee bend or a slightly shorter grip—not both in the same round.
- Use breathing as a checkpoint: If your breath becomes shallow or you start bracing, add slack and return to the easier version.
- Let range be the by-product: More motion is useful only when the pose still feels controlled. The starting-point check above is a body check, not a scorecard.
On days when you want less targeted stretching, a gentle yoga sequence can give the same areas easy movement without turning the session into a flexibility test.
If you want a concrete version of that gentler approach for stiff mornings, the free chair-yoga routine below gives you a 10-minute seated practice to try.
Get the 10-Minute Chair Yoga Routine for Stiff Mornings
Confirm to get the routine and yoga tips. Unsubscribe anytime.
Something went wrong. Please check your email address and try again.
Frequently Asked Questions About Yoga Straps
Make the Stretch Fit Your Body
A yoga strap for flexibility works best when it makes the pose more honest, not more extreme. Give yourself enough slack to keep breathing, keep knees and shoulders soft when they need to be, and let range change gradually. If you want a broader progression beyond these six stretches, use our complete yoga flexibility guide for more yoga prop stretches, routines, and beginner-friendly ways to keep building without chasing depth. The goal is not to touch your toes today; it is to make the next practice easier to return to.