Yoga poses for pelvic floor strength give you different positions to practice a small lift, a full release, and better awareness of how your pelvic floor coordinates with breath and movement. The goal is coordination—not the hardest squeeze. This guide uses five gentle poses and a two-question selector to help you choose a comfortable place to start.
If you have pelvic pain, pressure or heaviness, or new or worsening bladder or bowel symptoms, don’t assume you simply need more strengthening; pelvic-floor problems can also involve excessive tension or poor coordination. If you’re adapting yoga around another health concern, see our yoga for specialized health guide.
Choose a Gentle Starting PointTable of Contents
- What Is the Pelvic Floor?
- How to Find and Gently Engage Your Pelvic Floor
- Choose a Gentle Pelvic Floor Yoga Starting Point
- 5 Yoga Poses for Pelvic Floor Strength and Release
- Diaphragmatic Breathing and Pelvic Floor Coordination
- Practice Safely: When to Ease Off or Get Guidance
- Get the 10-Minute Chair Yoga Routine
- Pelvic Floor Yoga FAQ
- Aim for Coordination, Not Maximum Effort
What Is the Pelvic Floor?
Your pelvic floor is a layered group of muscles stretching from the pubic bone to the tailbone and between the sitting bones. These muscles support the bladder and bowel as well as internal reproductive organs; in male anatomy, they also support the prostate. They contribute to bladder and bowel control, sexual function, posture, and core stability.
Cleveland Clinic notes that a healthy pelvic floor needs both strength and flexibility: the muscles should be able to contract and fully relax.
Weak, Tight, or Poorly Coordinated?
Pelvic-floor problems are not all the same. The muscles may be weak, too tight, or poorly coordinated. Pregnancy and childbirth, surgery, aging, chronic coughing, repeated heavy lifting, stress, and other factors can contribute. Leaking, pelvic pain or pressure, constipation, or difficulty urinating are reasons to get individualized assessment rather than simply adding more squeezing.
How to Find and Gently Engage Your Pelvic Floor
Think of a small inward-and-upward lift, not a maximal squeeze. Yoga gives you a way to practice that light contraction inside breathing and movement, then notice whether you can release afterward. Keep the glutes and thighs as relaxed as you can, continue breathing, and make the release phase just as deliberate as the contraction.
Three Cues to Find the Muscles
- Gas cue: Imagine preventing yourself from passing gas and notice a gentle inward lift around the anus.
- Urine cue: Imagine briefly stopping urine flow to identify the muscles. Don’t make a habit of exercising while urinating; NIDDK advises against it.
- Vaginal cue, if applicable: Imagine a gentle inward-and-upward lift at the vaginal opening rather than a hard squeeze.
If you can’t find a gentle lift without tightening your stomach, thighs, or other muscles—or you can’t feel a full release afterward—don’t respond by squeezing harder. A clinician or pelvic-floor physical therapist can check your technique and may use biofeedback. If a cue increases pain, pressure or heaviness, or bladder or bowel symptoms, stop and use the breathing-first route below.
Choose a Gentle Pelvic Floor Yoga Starting Point
Answer up to two quick questions to choose a gentle place to start in this guide. This selector cannot diagnose whether your pelvic floor is weak, tight, or injured.
Step 1 of 2
5 Yoga Poses for Pelvic Floor Strength and Release
These five poses give you different positions to practice breathing, light engagement, and full release. None is universally best; choose a position that feels comfortable and keep the effort easy enough that you can still breathe and relax between contractions.
If a pose increases pelvic pain, pressure or heaviness, or leaking, stop rather than pushing through and use the safe-practice guidance below.
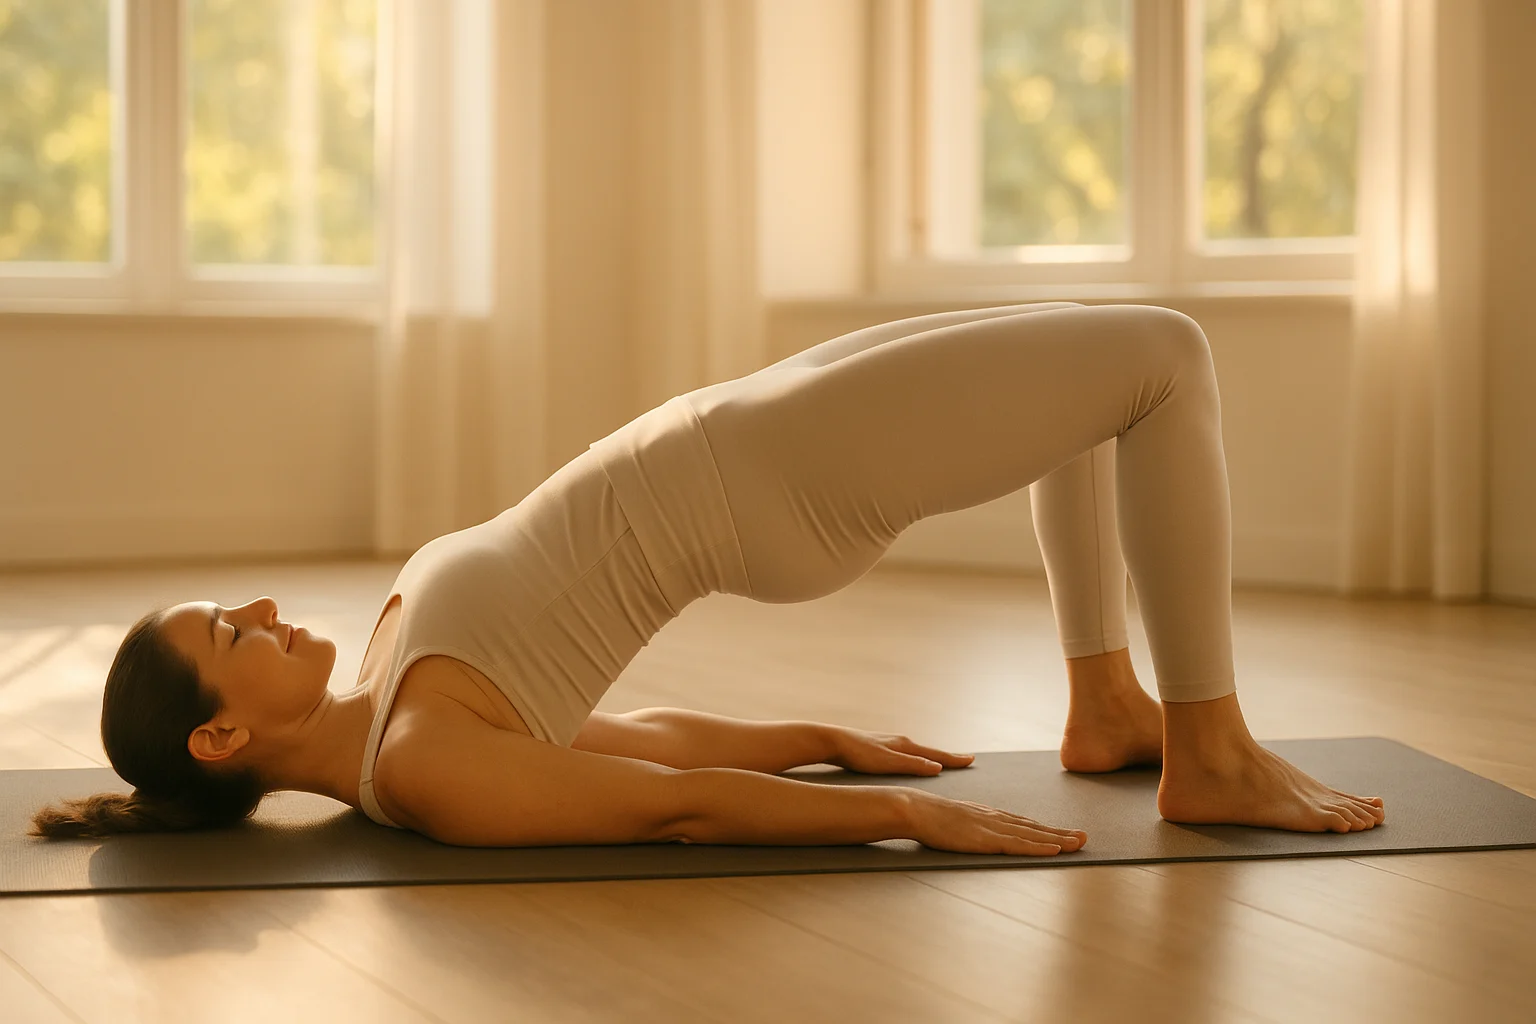
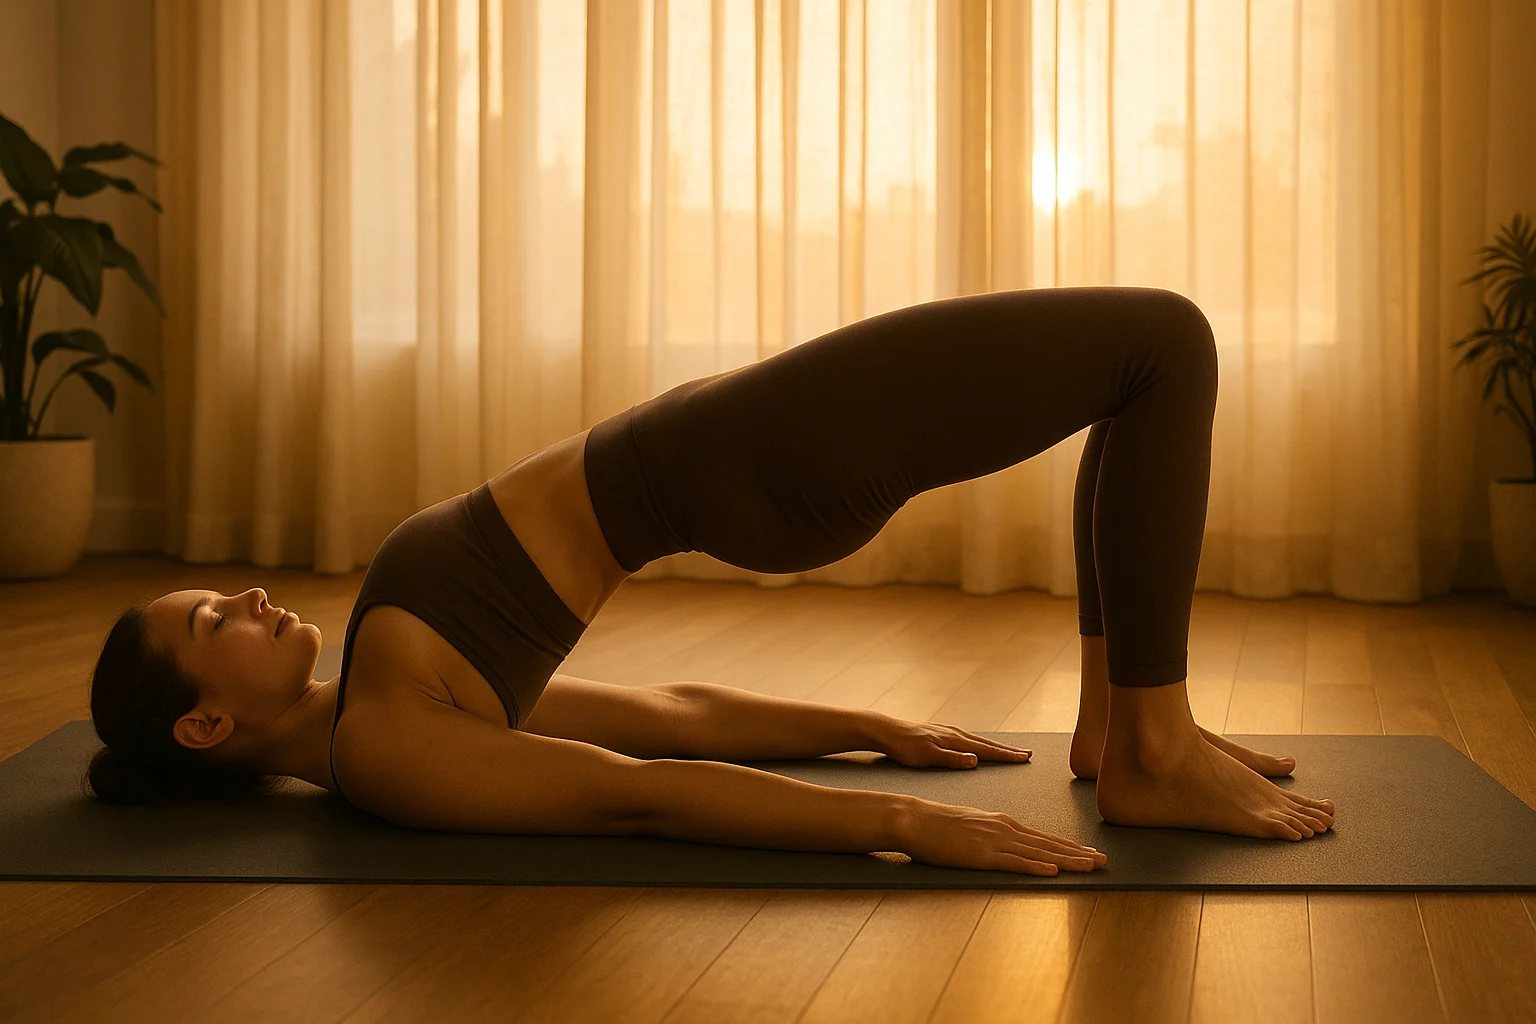
1. Bridge Pose (Setu Bandhasana)
Bridge works the glutes and hamstrings while giving you a supported position to practice a gentle pelvic-floor lift and release.
How to do it:
- Lie on your back with knees bent and feet hip-width; rest your arms by your sides.
- Take an easy inhale and let the effort soften.
- Exhale to press through your feet and lift your hips; add a light pelvic-floor lift if it feels comfortable.
- Inhale and soften the pelvic floor without dropping the hips abruptly.
- Exhale to lower with control, then fully release at the bottom.
- Repeat about 5 times, stopping if your low back or neck tenses or pelvic symptoms increase.
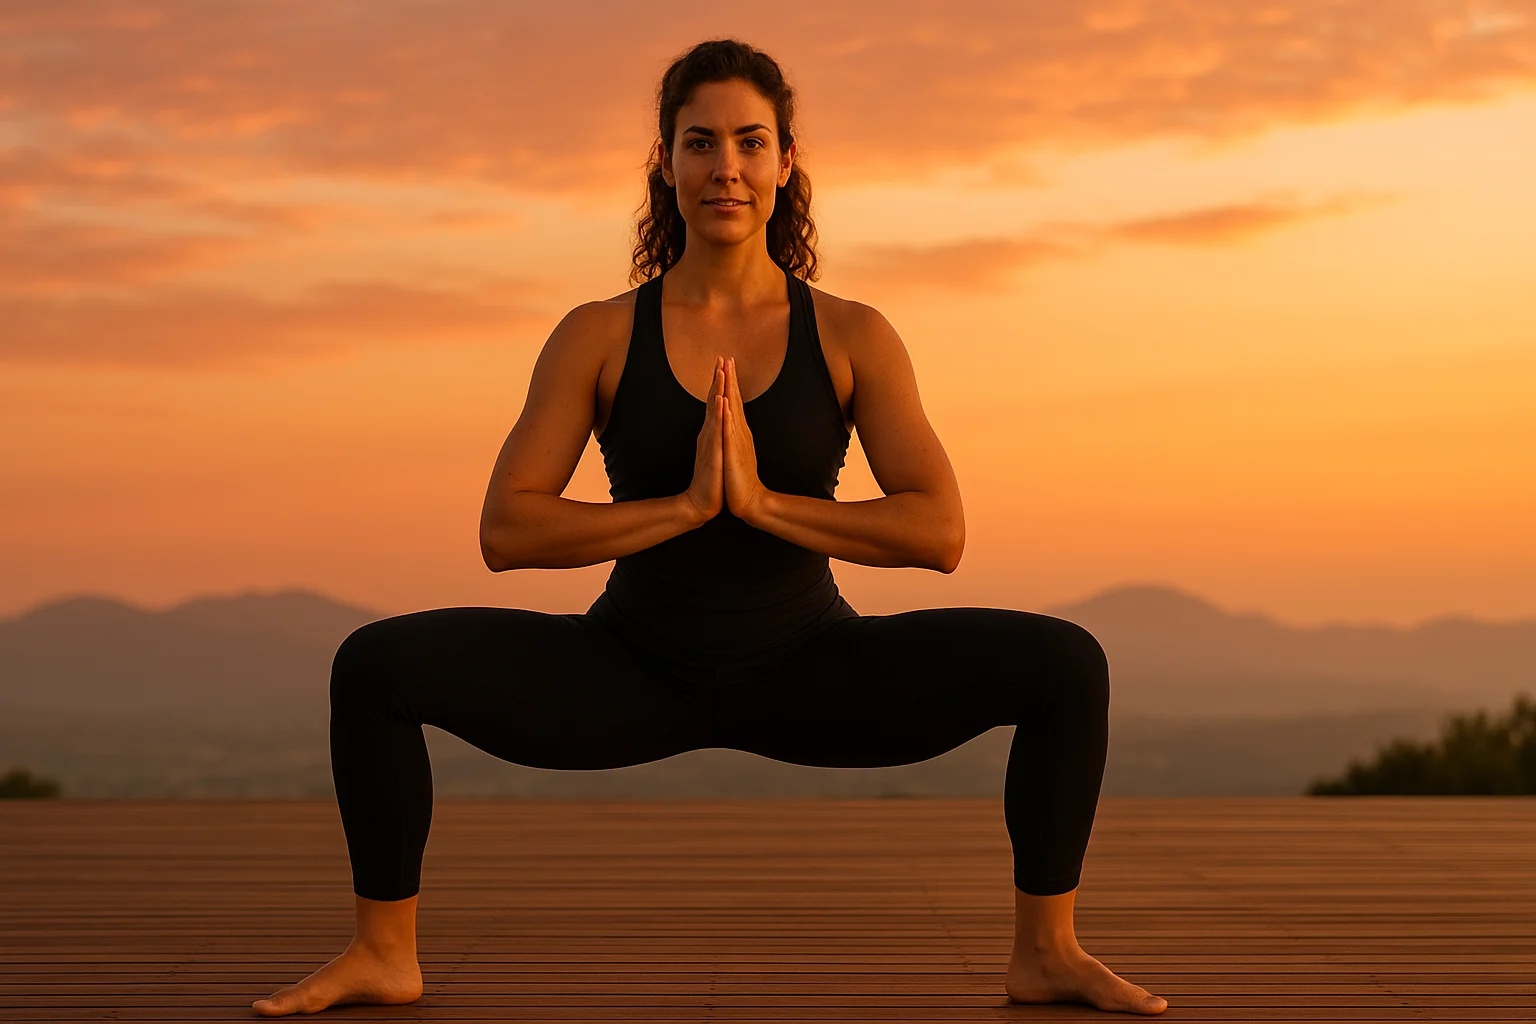
2. Goddess Pose (Utkata Konasana)
This wide stance can combine leg strength with a light pelvic-floor contraction, but the goal is not to stay clenched.
How to do it:
- Step wide with your toes turned out only as far as feels natural for your hips and knees.
- Inhale to lengthen through your spine.
- Exhale to bend your knees in the same direction as your toes; keep the depth comfortable.
- Add a small pelvic-floor lift on the exhale, then soften it on the inhale.
- Stay for 3–5 easy breaths, or rise sooner if you feel pelvic pressure, heaviness, or joint discomfort.
- Inhale to rise and release the effort.
3. Supported Deep Squat (Malasana Variation)
A supported squat can help you explore hip opening and pelvic-floor softening. Depth is optional; this pose is not a test of mobility.
How to do it:
- Stand a little wider than hip-width with your toes comfortably turned out.
- Lower only as far as you can without straining; place a folded blanket under your heels or sit onto a block or sturdy support if needed.
- Keep your breath easy and let the pelvic floor soften on the inhale.
- If the position feels comfortable, add a very small lift on the exhale, then release it again.
- Stay for a few comfortable breaths and press through your feet to stand.
- Skip the pose if it increases pelvic pressure or heaviness, pain, or leaking.
4. Cat–Cow Pose (Marjaryasana–Bitilasana)
Cat–Cow pairs spinal movement with breathing, which can make the lift-and-release rhythm easier to notice.
How to do it:
- Start in tabletop with wrists under shoulders and knees under hips, or adjust the setup for wrist or knee comfort.
- Inhale into Cow: let the belly soften and notice the base of the pelvis release.
- Exhale into Cat: round the spine and add a gentle pelvic-floor lift if that feels comfortable.
- Move through about 5 slow rounds without forcing either end range.
5. Child’s Pose (Balasana)
Child’s Pose gives you a quieter position to practice breathing and notice whether the pelvic floor can soften after strengthening work.
How to do it:
- Kneel with knees together or apart, whichever is more comfortable.
- Fold forward and support your torso on a bolster, pillows, or stacked blankets if that helps you relax.
- Rest your arms forward or by your sides.
- Take 5 easy breaths and notice whether the pelvic floor softens without forcing it.
Put It Together: A Short 3-Pose Sequence
If the selector did not send you to breathing-first and Bridge, Cat–Cow, and Child’s Pose all feel comfortable, try one easy round: about 5 slow Bridge repetitions, about 5 Cat–Cow rounds, then 5 comfortable breaths in Child’s Pose. Keep the breath easy and treat the sequence as practice, not a treatment plan.
Diaphragmatic Breathing and Pelvic Floor Coordination
The diaphragm and pelvic floor move in coordination during breathing. Instead of forcing a large contraction, use easy breaths to notice the pelvic floor soften with the inhale and gently recoil or lift with the exhale. If you want more general calming options, see these beginner breathing techniques.
How to Practice
Lie on your back or side in a comfortable position. Place a hand on your lower ribs or belly and take 5–8 unforced breaths. Let the abdomen and lower ribs expand on the inhale; on the exhale, notice whether the pelvic floor naturally follows with a gentle lift. If trying to add the lift makes you tense, stop adding effort and simply breathe.
Practice Safely: When to Ease Off or Get Guidance
Pelvic-floor symptoms can come from different problems, so use symptoms—not willpower—as your guide.
- Keep the effort light: You should be able to breathe normally and release fully between contractions.
- Start small: Begin with short, comfortable sessions and build gradually rather than chasing a fixed dose.
- Use props: Blocks, blankets, pillows, a wall, or a chair can make the position more comfortable.
- Stop for symptom changes: Back off if a movement increases pelvic pain, pressure or heaviness, leaking, or difficulty with bladder or bowel function.
- Get individualized guidance: A pelvic-floor physical therapist can assess whether you need strengthening, relaxation, coordination work, or a mix.
If none of those symptoms apply to you and a chair simply makes yoga more comfortable, our free 10-minute chair-yoga routine is a gentle seated option for mornings.
Get the 10-Minute Chair Yoga Routine
Confirm to get the routine and yoga tips. Unsubscribe anytime.
Something went wrong. Please check your email address and try again.
Pelvic Floor Yoga FAQ
Aim for Coordination, Not Maximum Effort
A useful pelvic-floor practice leaves room for both effort and release. Start with the selector, or use the short three-pose sequence after you’ve learned the poses and they all feel comfortable. Keep your breath easy, and resist the urge to treat every symptom as a signal to squeeze harder. Your goal is a pelvic floor that can respond, relax, and coordinate with the rest of you.