Got a nagging ache in your glute or a line of zing down the back of your leg? This yoga piriformis syndrome guide walks you through six simple poses and a few safety basics to settle the area. We’ll skip the jargon and show what to do, step by step. Like Sarah—who noticed things easing up after two weeks of short daily sessions—you can nudge your hips toward comfort. Ready to roll out the mat? This post is part of our larger resource on yoga for pain relief, your go-to guide for healing through movement.
Find Your Perfect Yoga Pose Now!Table of Contents
- What is Piriformis Syndrome and How Does It Differ from Sciatica?
- Why Yoga Works for Piriformis Syndrome Relief
- Preparing for Your Yoga Practice
- Targeted Hip-Release Poses (6 Essentials)
- Interactive Pose Selector (Piriformis)
- How Often Should You Practice?
- What to Avoid During a Flare-Up of Piriformis Pain
- Safety Tips to Keep You Comfortable
- Lifestyle Tips to Complement Your Yoga Practice
- Frequently Asked Questions
- Conclusion: Your Path to Piriformis Relief
What is Piriformis Syndrome and How Does It Differ from Sciatica?
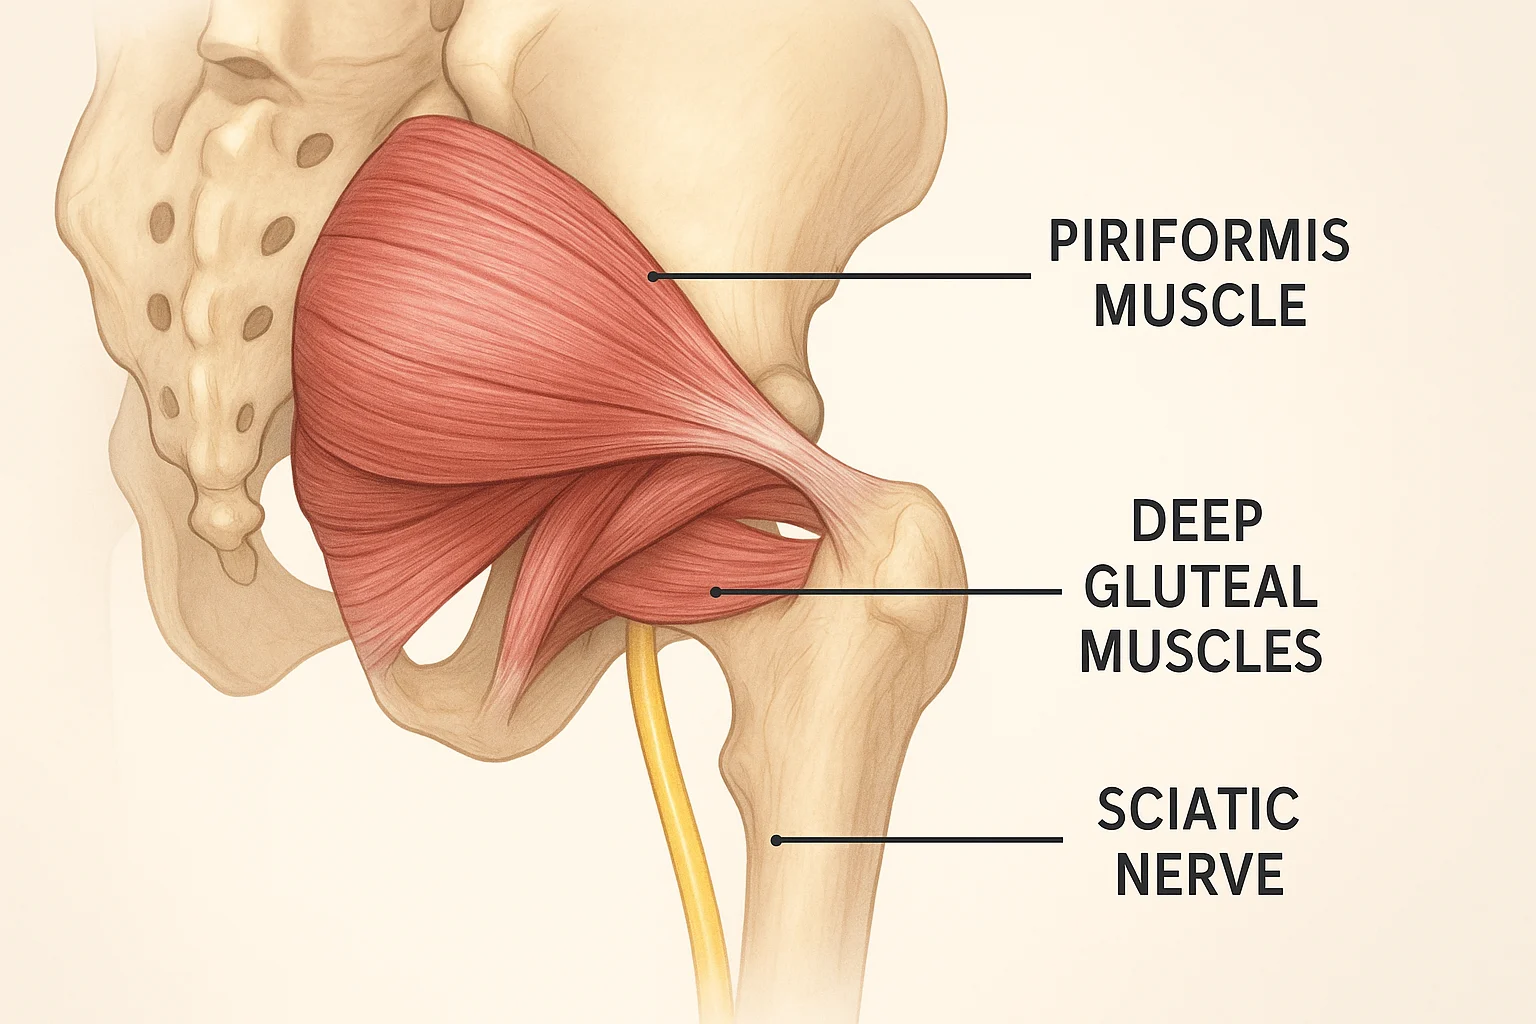
Imagine a small muscle deep in your glute called the piriformis—it connects your spine to your thigh bone and helps you rotate your leg outward, like when you step to the side. When this muscle gets tight or swollen, it can press on the sciatic nerve, which runs close by or even through it, causing pain, tingling, or numbness down your leg. For more on sciatica, check out this Mayo Clinic resource on sciatica. Unlike sciatica, which often starts with spine issues like a herniated disc, piriformis syndrome is all about that one little muscle acting up. That’s why targeted piriformis yoga poses can really help ease the discomfort.
If you’re also experiencing related discomfort, you might find hip pain yoga relief with poses from our guide on yoga for sciatica relief, which addresses similar conditions.
“Piriformis syndrome is a sneaky culprit behind sciatic pain. It’s often mistaken for a back issue, but the solution lies in soothing that muscle.”
Why Yoga Works for Piriformis Syndrome Relief
Research suggests yoga may help reduce sciatic-related symptoms over several weeks; results vary by individual. Yoga also supports flexibility, improves blood flow, and fosters a mind-body connection for intentional movement. Breathwork calms the nervous system, reducing stress-related tension. For more on this approach, check out our post on benefits of mindful movement yoga.
Preparing for Your Yoga Practice
Before you jump into yoga for piriformis syndrome, a little prep goes a long way to keep things safe and effective. If your pain is new or intense, check in with your doctor to confirm it’s piriformis syndrome. Pay attention to your body—gentle stretches are great, but if you feel sharp pain, ease off. Start with a quick 3-5 minute warm-up, like pelvic tilts or knee circles, to get your muscles ready. Grab props like a yoga strap or block to make poses more comfortable, and wear cozy clothes. Find a calm, quiet spot where you can focus on your breathing and relax.
This post has affiliate links. We may earn a commission. Learn more.
Protecting Your Wrists During Yoga
While piriformis yoga poses are mostly reclined or seated, other yoga practices might strain your wrists. Modify weight-bearing poses like Downward-Facing Dog by gripping the mat with fingertips or using a wedge under your palms. If wrists hurt, skip such poses. For targeted hip pain yoga relief, explore our guide on yoga for wrist pain relief.
Piriformis Yoga Poses: 6 Essentials for Relief
These six yoga poses target the piriformis and nearby muscles. Color indicators show intensity: Gray (supine/reclined), Yellow (light glute stretch), Green (deep piriformis release), Red (skip during flare-ups). Let’s calm that cranky piriformis with these hip-opening yoga poses! Looking for a simple piriformis-friendly routine? These poses are a great place to begin.
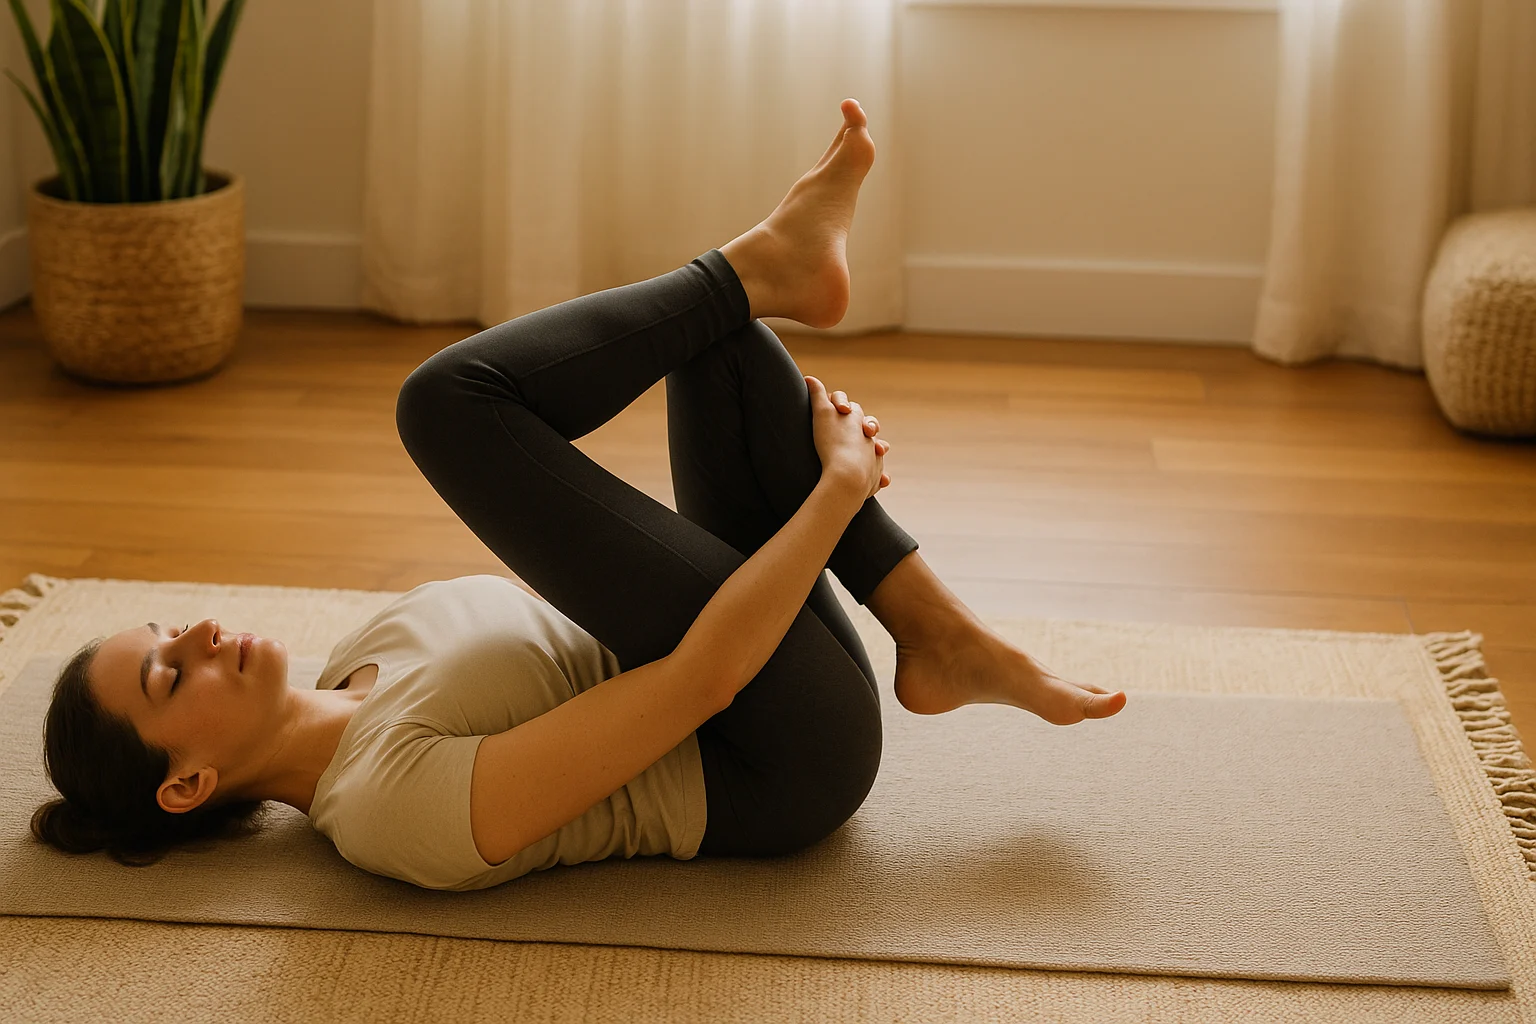
1. Supine Figure Four Stretch (Reclined Pigeon)
Color: 🟡 (Yellow for gentle, 🟢 Green for deeper)
Position: Gray (Supine/Reclined)
This classic piriformis stretch yoga pose gently stretches the outer hip. Here’s how:
- Settle in on your back with knees bent and feet flat on the mat, about hip-width apart.
- Rest your right ankle over your left thigh, letting your right knee open to the side.
- Feel a gentle stretch in your right glute. Want a bit more? Lift your left foot off the ground.
- Slide your hands behind your left thigh and gently draw it toward your chest, keeping your head relaxed.
- Take slow breaths and let the back of your hip get heavy on the mat; stay for 30–60 seconds.
- Ease out slowly and switch to the other side.
Summary: This pose is like a warm hug for your hip, easing piriformis tension with minimal strain.
2. Piriformis Stretch Yoga: Supine Strap Variation
Color: 🟢 (Green)
Position: Gray (Supine/Reclined)
This variation offers a deeper, controlled stretch using a strap or belt.
- Lie down with your legs stretched out.
- Bring your right knee up, placing the sole of your foot flat on the mat.
- Rest your right ankle over your left thigh to create a figure-four shape.
- Loop a strap around your left foot and lift your left leg toward the ceiling.
- Gently pull the strap while nudging your right knee outward with your hand.
- Feel a deep stretch in your right glute for 30 seconds to a minute, then switch sides.
Summary: Perfect for a targeted piriformis release, this pose uses props for precision.
3. Seated Glute Stretch (Cross-Legged Forward Fold)
Color: 🟡 (Yellow for light, 🟢 Green for deeper)
Position: Seated
This seated pose provides effective piriformis stretch yoga for the glutes and outer hips.
- Sit on a folded blanket with your legs stretched out in front of you.
- Bend your right knee and place your right foot outside your left knee.
- Bend your left knee, bringing your left foot toward your right hip.
- Stack your right knee over your left, or get as close as feels good.
- Take a deep breath in to sit up tall, then exhale and lean forward slightly, resting your hands on the floor.
- Hold for 30 seconds to a minute, feeling a gentle stretch in your right hip, then switch sides.
Variation: If mobility is limited, try this seated on a chair: rest one ankle over the opposite knee and lean forward gently.
Summary: A versatile stretch for glutes, adaptable with a chair for accessibility.
4. Modified Pigeon Pose (Eka Pada Rajakapotasana)
Color: 🟢 (Green), 🔴 (Red for acute flare-ups)
Position: On hands and knees, then extending
This powerful hip opener requires caution but is excellent for hip pain yoga relief.
- Start in a tabletop position on your hands and knees.
- Bring your right knee forward, placing it behind your right wrist, with your shin angled across the mat.
- Slide your left leg back, keeping your hips square. Pop a block under your right hip if it feels tight.
- Breathe in to lift your chest, then exhale and lean forward over your front leg.
- Hold for 30 seconds to a minute, making sure there’s no pain in your knee, then switch sides.
Note: If knee or sciatic pain increases, revert to Supine Figure Four.
Summary: A deep stretch for experienced practitioners, but gentler options work just as well.
5. Gentle Supine Spinal Twist
Color: 🟡 (Yellow)
Position: Gray (Supine/Reclined)
This gentle twist supports lower back and hip health, complementing a piriformis-friendly practice.
- Get cozy on your back with your knees bent and feet flat on the floor.
- Spread your arms out like a “T,” palms facing up.
- As you exhale, let both knees gently drop to the right, keeping your shoulders flat on the ground.
- Turn your head to the left for a nice neck stretch. Hold for 30 seconds to a minute.
- Come back to center and repeat on the other side.
Summary: A soothing twist to ease tension and enhance spinal mobility.
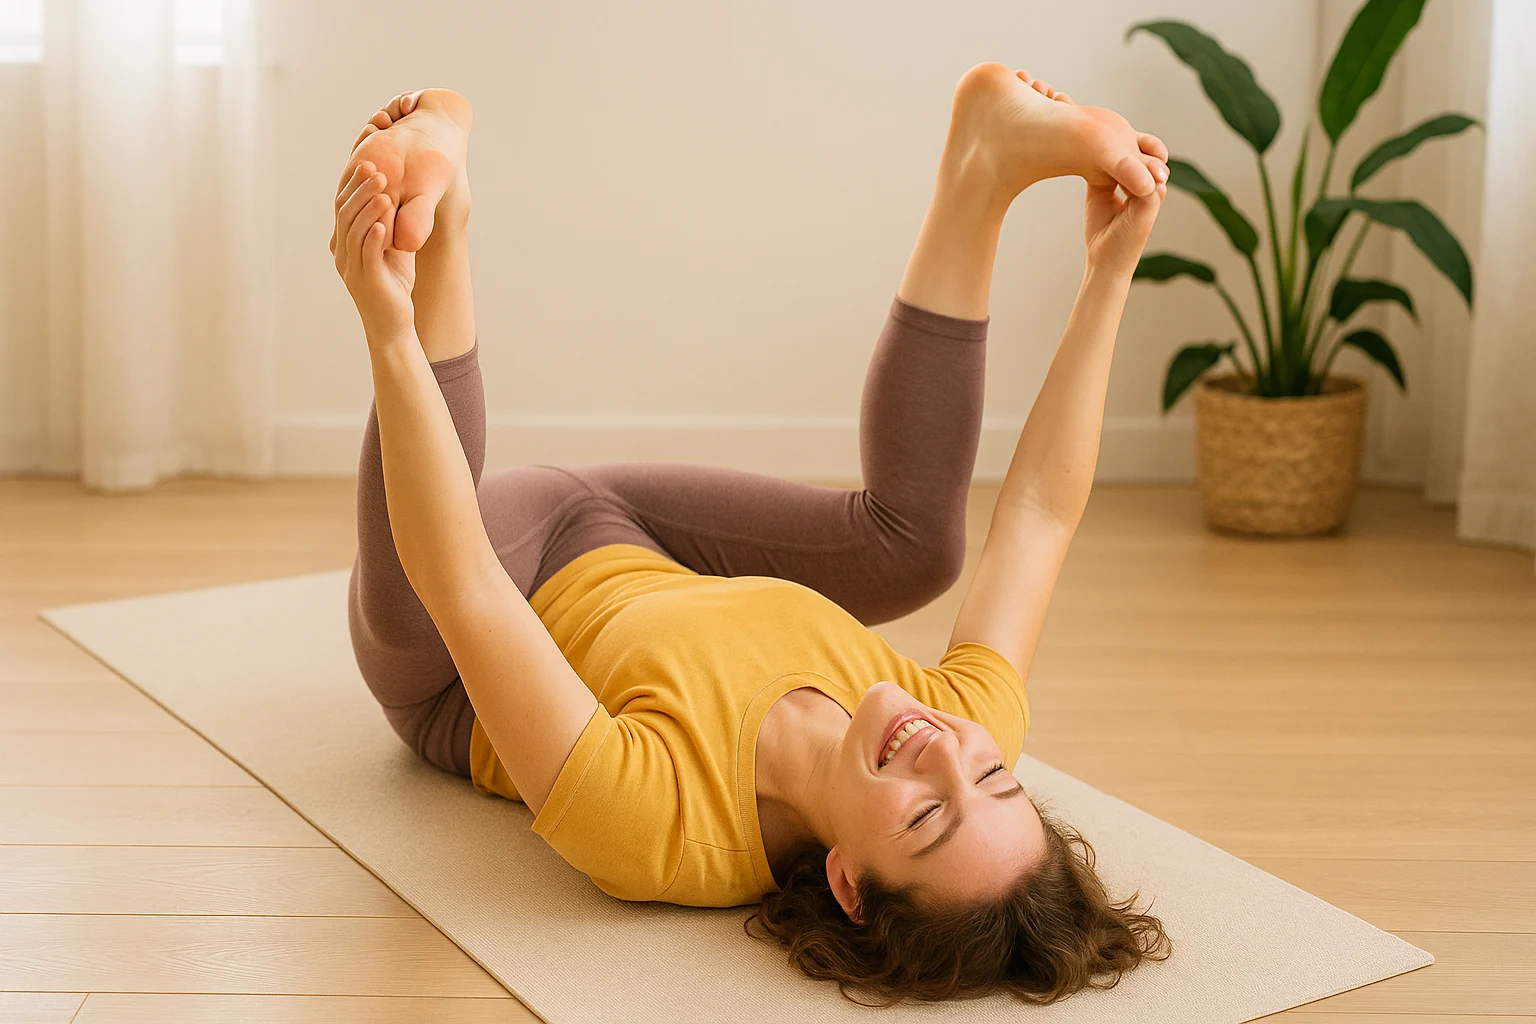
6. Happy Baby Pose (Ananda Balasana)
Color: 🟡 (Yellow)
Position: Gray (Supine/Reclined)
This playful pose is one of the best stretches for tight glutes and lower back and can help relax surrounding tissues.
- Lie on your back, bringing knees toward your chest.
- Grab the outside edges of your feet (or ankles/shins).
- Open knees wider than your torso, bringing them toward your armpits.
- Flex your feet, gently pulling them downward for 30 seconds to 1 minute.
- Rock side to side for a massage-like effect.
Summary: A fun, gentle way to release hip and lower back tension.
Interactive Pose Selector for Yoga Piriformis Syndrome
Find the perfect poses for your pain area with this tool, designed to guide you toward effective piriformis stretch yoga.
Choose Your Yoga Poses
Select your primary pain area to get tailored pose recommendations.
Select a pain area above to see recommended yoga poses for piriformis syndrome.
Yoga Piriformis Syndrome: How Often to Practice
Short and frequent beats long and rare: aim for 10–15 minutes, 5–6 days a week. On flare days, choose the easiest options (Happy Baby, gentle Figure Four). Mornings help shake off stiffness; evenings undo a day of sitting. After hours at a desk, try a 20-minute Supine Figure Four block. Many people feel a difference within a couple of weeks of steady practice.
“Think of yoga as a daily check-in with your body—it’s like giving your piriformis a friendly nudge to relax!”
What to Avoid During a Flare-Up of Piriformis Pain
When your piriformis is acting up and the pain is sharp, avoid anything that might make it angrier. Skip deep stretches like Pigeon Pose, as they can irritate the muscle further. Steer clear of high-impact activities like running or jumping, and try not to sit for more than 20 minutes at a time. Long bike rides on a narrow seat can also aggravate things, so opt for low-impact walking instead. Avoid crossing your legs or sitting on a bulky wallet, as these can squeeze the piriformis. And avoid pushing through sharp pain; it’s your body’s signal to pause and adjust.
Yoga Piriformis Syndrome: Safety Tips That Keep You Comfortable
To make your yoga practice effective, take slow, deep breaths—inhale to prep, exhale as you stretch, and let your nervous system relax. Feel free to grab props like blocks or straps to make poses easier and safer; for instance, a block under your hip in Pigeon Pose can be a lifesaver. Kick off with 3-5 minutes of gentle moves to warm up, keep hydrated, and move with care. If pain sticks around, chat with a yoga therapist for personalized guidance. Gentle, regular practice beats overdoing it any day.
For related hip and back discomfort, you might also benefit from our guide on yoga for lower back and hip pain.
Lifestyle Tips to Complement Your Yoga Practice
Beyond yoga for piriformis syndrome, small lifestyle tweaks can help keep flare-ups at bay. Sit with your spine straight to maintain good posture. Every 30 minutes at your desk, take a quick break—maybe a 2-minute walk or a Supine Figure Four stretch. Choose supportive shoes to keep your gait balanced, and lift objects using your legs to spare your back. Combine hip pain yoga relief practices with regular walking breaks and ergonomic seating for best results.
Frequently Asked Questions
Conclusion: Your Path to Piriformis Relief
If your hips have been cranky, these piriformis yoga poses—especially Supine Figure Four and Happy Baby—can take the edge off and help you move with less tension. Pair a few minutes of practice with simple habits like better posture and short standing breaks, and you’ll give your glutes room to calm down. Go gently, notice what feels good, and build from there.